For the average dog owner, trimming a dog’s nails can be one of the most challenging grooming activities. In this guide, I’ll share some tips on learning how to trim a canine’s nails with no hassle.
If you’re attempting to cut your dog’s nails for the first time, the most important thing is to remain patient. This guide is tailored to the needs of squeamish dog lovers, new or intermediate owners who wouldn’t mind adding some more tips to their dog’s nail care procedures.
Do you have a specific question about trimming dog’s nails at home? Then use the table of contents below to jump to the most relevant section. And you can always go back by clicking on the black arrow in the right bottom corner of the page. Also, please note that some of the links in this article may be affiliate links. For more details, check the Disclosure section at the bottom of the page.
Here's what we'll cover:
Why trimming your dog’s nails is important?
Most of the owners have been scratched by their pets. However, there are lots of reasons why you should take your pup’s nail grooming pretty seriously:
- Coupled with many bruises, there’s a high risk of your dog accumulating bacteria and germs under his nail bed when his nails grow too long and are not trimmed down. So while he grows those claws and makes clickety sounds around the house. To keep your dog comfortable and healthy, he has to have his nails trimmed regularly.
- If a dog has long nails, there’s a high chance of getting his nail broken by accident. This is usually a very messy and painful experience you definitely don’t want your furry friend going through. Long nails could also cause your dog’s toes to splay, leading to bad tendon injuries or even a deformed leg structure.
- In rare cases where a dog’s nails have grown really long to the point of curving into his paw, this can cause severe injuries to the soft pad of his paw. It can also give your dog trauma or bad memories associated with walking because of the sort of pain that could have been inflicted on him.
The benefits of trimming dogs’ nails at home
Save up on time
Preparing your dog and driving to a groomer’s shop to get your puppy’s nails cut is time-consuming. Learning how to cut your dog’s nails at home could reduce the stress and time you could spend on a trimming session.
You have the luxury of choosing when you want to do it, leaving you with just enough quality time to spend with your dog.
Save up on funds
You can never go wrong with saving the extra money you could have spent on a trip to the groomers. On average every other grooming session can cost you anywhere from $60 to $90. If you learn to do the same job as your trimmer, you could invest some cash into buying essential grooming gadgets for your dog. They are usually cost-effective and would save you a lot of stress since they’re one-time buys.
Bonding with your dog
The whole procedure of trimming your dog’s nails creates an atmosphere for you and your pet to bond and spend quality time together. Soft-spoken words of reassurance, a warm grip, and calming, gentle trimming gestures certainly give your pet some room to trust you more. The more you have some grooming time with your buddy, the more you build trust and a deeper connection.
How long should dog nails be?
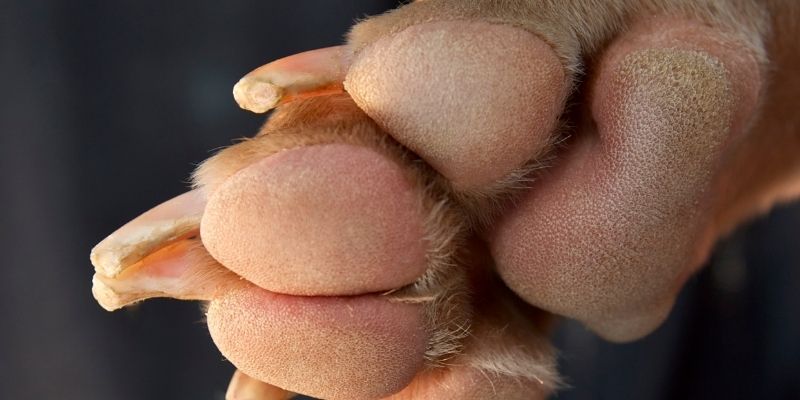
The healthy, acceptable length for a dog’s nails should be about 2 millimeters close to his paw. Once they are past it, you would need to do some trimming.
Trim his nails until they are just a little over his quick, and he’ll be okay to do another round of growth. Beware of cutting through your dog’s quick.
It’s advisable to cut your dog’s nails every three-four weeks. The shorter they remain, the healthier your puppy will be.
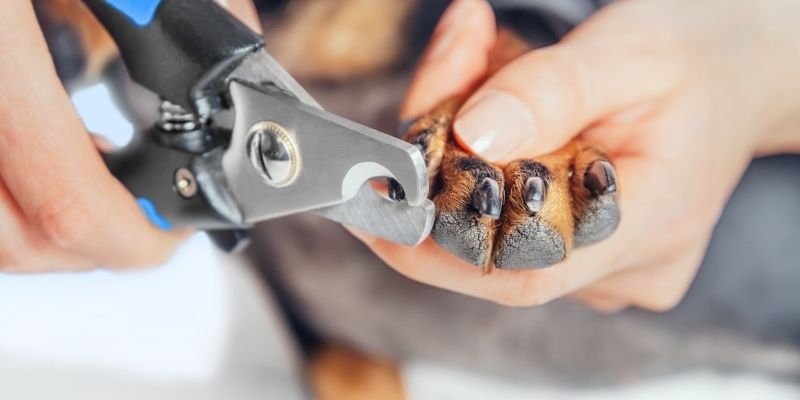
How to trim black dog nails?
First, you locate the quick. It’s usually a tiny blood vessel in your dog’s nail. It appears pink in color and can be very hurtful if it mistakenly cuts your dog.
Look closely at your dog’s paw and take note of the pink line running along his nail bed. That right there is his quick.
The next thing you do is to trim only around his quick. You can start by trimming your dog’s nails up to his pulp and avoiding the urge to cut further.
It’s quite challenging, but these tips will help you keep it all under control.
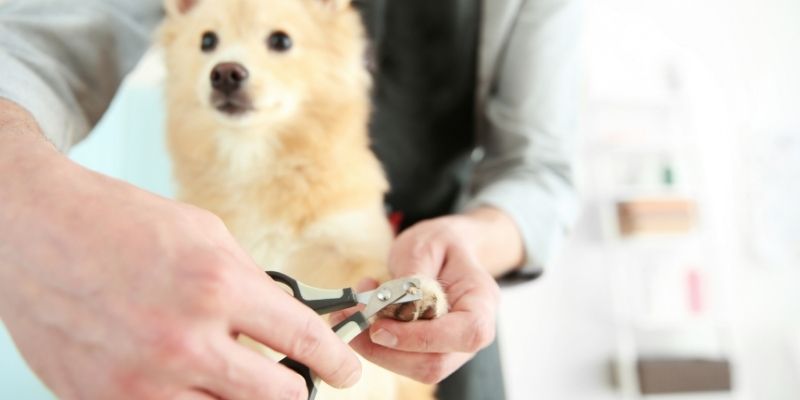
How to trim a dog’s nails?
You need to be gentle, calm, and firm. The first thing is to make your dog feel at ease. For example, you could try putting his favorite treat on your lap to get him to stay steady and in one spot.
However, consider what method of trimming you’d like to engage. Clippers and grinders serve as the main tools for nail trimming.
Your tool of preference should be chosen based on your dog’s breed, needs, habits, and behavioral patterns. But one thing is universal – your pup might be nervous before and during the procedure as some devices can go really hard on a dog’s claws. So you might want to get a smoothly working dog nail grinder to make sure your pet is calm, still, and happy.
Grinders are generally beginner-friendly as to how much control they can give you.
Step by step guide on how to trim your dog’s nails at home
First off, you’ll have to get your dog comfortable with trimming and all the related tools. Let your pup sniff the grinder/clipper and get a feel of it. Next, touch the pup’s nails and paws with it and offer lots of treats when it lets you do this. Next, turn on the grinder, and let the pet get used to the vibration. Finally, work your way to getting him restful and okay with the idea of a trim.
Once you’re done introducing your pup to the tool, you can proceed with trimming:
Step 1: Gently take your dog’s paw and push a bit of his hair back so you can get a good view of his nails. A quick tip can be using a sock and allowing its nails to poke through so you’re sure none of its hair is getting in the grinder’s wheel.
All the while, be firm but gentle. Make soothing sounds so the pup is reassured and less anxious.
Step 2: Push your thumb upward and downward on your dog’s paw to bring his nails forward. Once his nails are all out in the clear, you can now start trimming.
Step 3: Begin by trimming only the tip of his nail. Make sure to position your grinder at an angle of 45 degrees and cut across. Hold your grinder firmly and make sure your fingers are higher up than below for easy control and movement.
Step 4: Trim until his nail length leveled up with the paw. Avoid touching your dog’s quick (the pink line close to his paw in his nail bed). Always ensure to put your grinder just below it.
Grind slowly from the outside in. First, the top corners of your dog’s nails and then move inward.
Step 5: Hold your dog’s paw gently and reassuringly. Make sure to grind in a curve-like motion, keeping track of uneven edges and making them smooth.
If you happen to overtrim your dog’s nails, apply pressure on the point of contact with a clean cloth and press down securely. You need to hold on tight to your dog and be ready for the pet to move and fight.
Next, apply a styptic powder or pencil directly to the wound. This would aid the wound in clotting quickly. You can get a styptic powder or pencil from a trusted pet store or a pharmacy.
The last step is to have the injury bandaged to prevent bacteria from getting in. Closing the affected area with a bandage will also give the cut space to properly heal.
Trimming your dog’s nails shouldn’t be a hassle if you know what to do. Last advice: be patient, especially when the pet squirms and isn’t taking the first trimming experience well. Be calm and understanding, take note of the pup’s behavior, and give plenty of treats.
Thanks for the blog graphics: Canva.com

Thanks for the blog graphics: Canva.com
Doghint.com is a participant of several affiliate programs. The list includes (but not limited to) the following: VigLink, Refersion, ShareASale, and Amazon Services LLC Associates Program, an affiliate advertising program designed to provide a mean for us to earn fees by linking to Amazon.com and affiliated sites. Doghint.com does not intend to provide veterinary advice. All published articles are meant for informational purposes only and not substitute the professional veterinary consultation.